Showing posts with label konad stamping nail art. Show all posts

Sunday, January 5, 2014

Tuesday, October 1, 2013

Wedding Series ♡ Part 2

French tips with flowers and bows.
Adding something a little extra to a regular french tip, makes it unique.
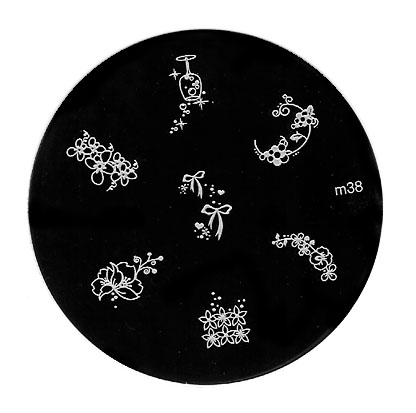
Bow (M38) . Flower (M81)

Thursday, September 26, 2013

Wedding Series ♡ Part 1

We are starting a wedding series featuring the Konad Stamping Nail Art!
Let's start off by showing you the very basic French Manicure :)
I hope these upcoming designs/photos can give you some inspiration!

Saturday, May 4, 2013

M92 Cupids


A design featuring one of the new designs from M92!
The pearl design is from M62

Tuesday, April 30, 2013

Rose inspired nails

01. apply a base coat
02. paint half the nail a light blue colour
(OPI 'I Vant To-Be Alone Star')
03. stamp on the rose with a white stamping polish
 04. stamp another rose with the pink stamping polish
05. apply rhinestones
06. apply top coat

*to get the gradient effect, paint the rose with the white and pink at the same time
 
Konad Image Plate: M13 (rose)

Sunday, January 13, 2013

Sweet Polkadots

Colour: Nubar 'Twilight Kiss'
Designs: M79 (polkadots), M3 (bow)
Konad Stamping Colours: yellow and white
Glitter: CM diamond glitter
Top: Konad top coat

STEPS
- apply a base coat of your choice
- paint half the nail or just the tips with the light purple polish
- wait for it to dry
- stamp on the yellow polkadots (from the purple line to the tip)
- stamp on the white bow in the middle of the line
- apply glitter along the line on each side of the bow
- apply top coat
- wait for it to dry :)


*Feel free to leave a comment, if you want to know how
to do a specific design from our website gallery!

Check out our top 3 nail designs on Instagram!

Friday, November 9, 2012

Orange Lips

Colour: Nubar 'Citadel' (light grey)
Leaf Print: Konad Imade Plate M83
Lip Print: Konad Image Plate M84
Green Leaves: Konad Image Plate M82 (tiny leaf from one of the flowers)
Glitter: CM 'Diamond Glitter'
Top: Konad top coat

Thursday, April 12, 2012

raining silver glitter and neon pink


You will need:
Base: Sally Hansen Green Tea & Olive base coat
Yellow Pastel polish: China Glaze 'Lemon Fizz'
Pink Special polish: Konad 'Psyche Pink'
Top Coat: Konad top coat Silver Glitter: CM 'Silver Glitter'
Nail polish remover / Nail polish remover corrector pen
Konad Image Plate: M77

Steps:
01 apply base coat *let it dry
02 apply the yellow polish on half the nail or the tips *let it dry
03 paint the psyche pink special polish on the design and scrape off the excess
04 pick up the design with the stamper within' 1 second after scraping
05 roll the design along the tips
06 clean up any excess polish around the finger with a cottob swab
     or a French nail corrector/nail polish remover pen
07 apply the glitter polish along the line of the tip
08 apply top coat *let it dry
09 you're done!

I think this nail design is a great way to start off spring and summer!
Let me know how you guys like this format? is it somewhat more interesting
or helpful? I think you guys can see the steps more clearly this way.

Sunday, March 11, 2012

coral blossom


you will need:
- base/top coat
- coral/orange polish
  OPI 'Are We There Yet?'
- Konad image plate S9 (cherry blossoms)
- Konad special polish in White

01. Apply a base coat of your choice
02. Paint the colour on 1/3 of the nail from the tip.
03. Stamp the design along the line, with the special white polish
04. Apply the Konad top coat

This is a quick design with very little drying time :)

 enjoy the spring weather :)

Friday, February 10, 2012

Wine Romance


you will need:
- base/top coat
- M71
- dark red nail polish (Nubar 'Raspberry Truffle')
  colour on the ring finger (Nubar 'Elegant Indigo')
- Konad special polish in white

This design is not too feminine, but still very romantic and a bit sexy :)

Saturday, January 14, 2012

Love Sparks


you will need:
- base/top coat
- M65
- Konad special polish in white
- Colourful glitter polish (OPI 'Rainbow Connection')
- light pink or purple polish for the tips
  (OPI 'Significant Other Color')

instructions:
01 - apply base coat *let it dry
02 - paint on the tips with your preferred nail colour *let it dry
03 - paint half of the rose design and stamp it on the tips
04 - apply the glitter polish along the line of the tips or randomly...
       however you want it :)
05 - apply the Konad top coat *let it dry
06 - admire :)

This will be a lovely design for Valentine's Day ;p

have fun :)

Thursday, December 8, 2011

First snowfall...


you will need:
- base/top coat
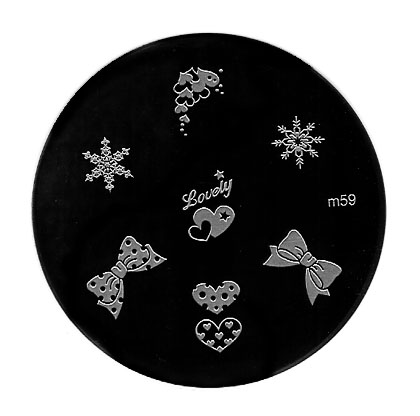
- M20 and M59
- Konad special polish in White
- light gold nail polish (OPI 'Glamour game')
- dark glitter polish (China Glaze 'Some Like It Haute')

Instructions:
01. apply base coat *let it dry*
02. paint the light gold polish diagonally
      along one side of the tip of the nail *let it dry
03. paint the dark glitter polish diagonally along
      the tip of the nail on the other side * let it dry
04. paint half of the snowflake designs with the
      Konad special polish in White, scrape and stamp
05. stamp the snowflake along the dark glitter polish
06. continue on all nails or just do a few
07. apply top coat

Saturday, November 26, 2011

The Girl From The Future


You will need:
- base/top coat
- light purple nail polish of your choice for the base
I used Nubar 'Twilight Kiss'
- a silver chrome polish
I used China Glaze 'Millennium'
- CM silver glitter
- M65 (swirls)
- Konad special polish in Silver

Instructions:
01. Apply base coat *let it dry
02. There are 2 ways of painting the 2-tone base colours
(you can use clear tape to guide you if necessary)
1. Apply the light purple polish on half the nail *let it dry
or
2. Apply the light purple polish on the whole nail *let it dry
03. Paint the silver polish on the other half *let it dry
(you can use clear tape to guide you if necessary)
04. Paint half of the swirl design with the special polish in silver
05. Stamp on the 'light purple' half of the nail
06. Paint a thin line of the silver glitter in the middle between the 2 base colours
07. Apply top coat

Done! have fun with this design :)

Friday, November 25, 2011

Espresso Lane


You will need:
- Konad Image plate M85
- base/top coat
- Konad special polish in Gold
- Base colour (Shellac 'Fedora')
   You can also use OPI 'Get in the Espresso Lane'

I'll start including instructions only for the more complicated designs :)
This is just one design, so very self explanatory! :)
Have fun! and Happy Thanksgiving for those who are celebrating it this month!

We are also doing Shellac manicures at our Downtown location!

Tuesday, September 27, 2011

Simply dainty


Base: Cuccio Natural base coat
Colour: OPI 'Totally Forth Worth it' (2 coats)
Design: M20
Stamping colour: Konad special polish in white
Glitter: CM crystal glitter (loose glitter)
Top: Konad special top coat

01. apply base coat
02. apply the colour
03. paint the dandelions in white, scrape off excess, stamp
       (imagine them floating about on your finger nails! make it random)
04. apply some loose glitter to add to the effect
       (sheer glitter polish works just as well!)
05. apply top coat

Under the sea


Base: Cuccio Natural base coat
Colour: OPI 'Swimsuit... Nailed it'
Designs: tip (m45) sakura blossom (m31)
Stamping colours: Konad special polish in silver and white
Tip lining: CM silver glitter
Top: Konad special top coat

01. apply base coat
02. paint the tips of your nails with the blue polish
03. line the bottom of the tip with the silver glitter
04. stamp on the tip design with the Konad special polish in silver
05. paint half of the cherry blossom with the Konad special polish
       in white and stamp it above the silver glitter lining

You don't have to place the flowers on all your nails...

Monday, August 29, 2011

Weddings: Simplicity


You can choose colours that will correlate with
the wedding you are going to be attending :)
you will need:
- M51
- base coat of your choice
- colours of your choice for the tips
- silver glitter (or other colours)
- Konad top coat
- Konad special polish in white (or other colours)

- apply the base coat *let it dry*
- paint the tips *let it dry*
- stamp on the desired flowers, they can be placed randomly or to the side
- apply the glitter polish under the tip
- apple the Konad top coat to protect the design *let it dry*

have fun :)